Vacant Home Staging: Smart Tips, Costs & Faster Home Sales
Vacant home staging is the art of furnishing an empty property just enough to help buyers understand scale, function, and emotional potential—and it works. National surveys show staged listings generate offers 3–30 % higher and spend roughly half as many days on the market compared with bare, echoing rooms. By filling that imagination gap, sellers trade silence for swift, profitable negotiations.
This guide hands you a practical, number-backed roadmap to achieve the same advantage. You’ll learn why psychology matters, how to build a smart budget, and which rooms deserve the spotlight. We’ll break down furniture scale, color palettes, logistics, marketing, and common missteps, complete with cost ranges and Central Florida nuances. Follow along and you’ll know exactly when to DIY, when to hire a pro, and how to measure the return—all before the first showing.
Ready to turn static square footage into a move-in fantasy? Let’s jump straight to the strategies that move listings from “For Sale” to “Sold.”
Step 1: Grasp the Impact of Vacant Home Staging on Buyer Psychology
Before a single sofa is rolled off the truck, it helps to understand the mental math buyers run the moment they step through the door. A blank house leaves that arithmetic entirely up to them—often with disappointing results.
Empty space vs. lived-in feel: why eyes and emotions disengage
When rooms are empty, depth cues disappear and every flaw is magnified. Most shoppers can’t gauge whether a king bed fits or where the TV would go because of two hard-wired biases:
Imagination gap – humans visualize objects better when at least 30 % of the scene is already filled.
Anchoring – first impressions set a price baseline; barren spaces subconsciously anchor low.
Add echoing acoustics and buyers label the home “cold,” even if the thermostat reads 72 °F. Thoughtful staging provides visual scale, warm textures, and a cue for how life could unfold there—turning analytical objections into emotional attraction.
Proven benefits: faster closings and higher sale prices
Industry data backs up the gut feeling:
−50 % average reduction in Days on Market for staged vs. vacant listings
81 % of agents say staging helps buyers picture the property as a future home
20 % of sellers report offer prices 6–10 % above asking after staging (NAR 2023)
Less time on MLS also means fewer price cuts, keeping negotiations in the seller’s court.
Is staging a vacant home worth it?
Typical return on investment for vacant home staging ranges from 100 % to 400 %—spend $3 k and potentially net $6–12 k more at closing. Consider staging if:
Comparable homes in your price bracket show well online.
Your carrying costs climb quickly (taxes, HOA, vacant-home insurance).
You need a contract in under 45 days.
If at least two boxes check “yes,” staging isn’t a splurge—it’s smart strategy.
Step 2: Calculate Your Staging Objectives and Budget
Think of vacant home staging like any other pre-sale upgrade: you put dollars in only if you expect more dollars back out—and quickly. Clarifying who you’re trying to attract, how fast you need to sell, and what you can realistically spend keeps the process from turning into open-ended décor therapy.
Define your selling timeline and target buyer avatar
A condo near downtown Orlando priced under $350 k attracts very different eyes than a $900 k lakefront property in Winter Park. Outline both:
Timeline: Are you aiming for a 15-day blitz or a 90-day cushion? Shorter windows favor turnkey, professional packages.
Buyer avatar: Pin down age, lifestyle, and likely taste so the staging story resonates.
Buyer Persona Price Band Style Notes (Central FL) Young Professionals $250k–$450k Clean lines, tech-friendly touches, pops of color Growing Family $400k–$650k Durable fabrics, homework nook, soft neutrals Downsizers $500k–$800k+ Transitional furniture, low-maintenance greenery
Match accessories and furniture scale to the persona, not your personal taste.
Budget benchmarks: what most sellers actually pay
Nationwide, total vacant staging packages land between $1,500–$7,000. Expect:
$500–$1,000 per “main” room (living, primary bed, dining)
$25–$200+ hourly design fees if billed à la carte
In Central Florida, furniture rental skews 8–12 % cheaper during off-season but can jump in summer when listings spike
Rule of thumb: earmark 0.75–1 % of the asking price for staging if the home is under $600 k; slightly less above that due to economies of scale.
Complete cost breakdown
Fixed Costs
Initial consult or design plan
Delivery, pickup, and installation labor
Liability insurance coverage
Variable Costs
Monthly furniture & rug rental
Artwork, bedding, towels, décor accents
Utility reactivation, lawn maintenance, storage for homeowner items
Hidden surprises often overlooked: touch-up paint, extra light bulbs, and post-staging cleaning before photography.
DIY vs. professional staging: how to choose wisely
Option Pros Cons Full DIY Lowest out-of-pocket, creative control Time-intensive, limited inventory, buyer skepticism Hybrid (e-design + rented pieces) Moderate cost, guidance on layout Requires self-install, learning curve Professional Package Turnkey speed, polished look, marketing boost Higher upfront cost
If your carrying costs exceed $150/day or the competition is stiff, hiring a seasoned stager usually pencils out. Otherwise, a hybrid plan can stretch dollars without sacrificing polish.
Step 3: Assess the Property Room-by-Room
With budget numbers in hand, the next move is an honest audit of the space you’re about to furnish. A systematic walk-through uncovers the quick wins—and the hidden money pits—so every staging dollar lands where buyers care most.
Use the 3-Foot/5-Foot rule to spot detail and big-picture flaws
Grab a clipboard and stand three feet from each wall. Anything that jumps out—dinged baseboards, chipped outlet covers, nail holes—goes on the “detail fix” list. Now back up to roughly five feet and view the same area. At this distance you’re seeing what a touring buyer sees: uneven paint sheens, awkward cable jacks, off-center light fixtures. Walk every room twice, recording issues in two columns. That simple exercise becomes a printable checklist you (or your handyman) can knock out in a single afternoon.
Prioritize high-impact spaces
Staging a vacant home doesn’t mean staging every square foot. Rank rooms by influence on purchase decisions:
Living/Great Room
Primary Bedroom
Kitchen (eat-in area or island seating)
Dining Room
Entry/Foyer
Bathrooms
Outdoor living/patio
In most Central Florida starter homes, buyers mentally decide within the first three spaces. Secondary bedrooms and utility areas can often stay empty without hurting perceived value, especially if budget is tight.
Identify problem areas and quick cures
Vacant houses develop quirks that furnished homes hide:
Echo chamber acoustics: Place a medium-pile area rug and a fabric accent chair—instant sound absorption.
Harsh lighting: Swap older CFL bulbs for 3000–3500 K LEDs to create daylight warmth in online photos.
Scuffed walls and baseboards: A gallon of contractor-grade eggshell covers about 350 sq ft for under $30.
“Flat” first impression: Lean a full-length mirror opposite the largest window to bounce light and visually expand the room.
Treat these fixes like triage. Resolve any Issue-A that a buyer notices before they can admire Feature-B. Once the high-impact rooms feel clean, bright, and acoustically comfortable, you’re ready to layer in the furniture that transforms square footage into lifestyle aspiration.
Step 4: Create a Cohesive Design Plan
With repairs done and priorities set, it’s time to turn raw square footage into a narrative buyers can’t resist. A cohesive design plan keeps every room working toward a single goal: letting shoppers picture their own life in the home. Consistency in color, scale, and style is what elevates vacant home staging from a random furniture drop‐off to a full-blown marketing tool.
Choose a neutral, market-friendly color palette
Neutrals photograph best and offend no one, so start here. Whites with a hint of warmth (“Swiss Coffee”), light grays (“Agreeable Gray”), and greige tones bridge traditional and contemporary tastes while bouncing Florida sunlight around the room. Keep the walls, large rugs, and anchor upholstery in these hues, then inject personality with removable touches—indigo pillows for a downtown loft, sage throws for a lakefront cottage. Limiting the palette to three base colors plus one accent prevents the “furniture showroom” vibe.
Furniture scale and placement that defines each space
Buyers need to understand function immediately:
Float the sofa 8–12 inches off the wall to create a conversation zone.
Use an 8' × 10' rug as the visual island; front legs of all seating should rest on it.
Maintain 36" walkways so traffic flows naturally during showings.
Dining tables: leave 42" clearance from table edge to nearest wall or buffet.
Example: In a 12' × 16' living room, center a 6' sofa facing the focal wall; flank with two 28" accent chairs and a 48" coffee table. The arrangement fills roughly 65 % of the floor print—enough to signal purpose without crowding.
Layer lighting, textiles, and greenery for warmth
Overhead cans alone cast harsh shadows. Add table lamps at 5' eye level and floor lamps in dark corners. Textiles soften acoustics—think chunky knit throws, linen drapes hung high to elongate ceilings, and a leather ottoman for tactile contrast. Two to three pieces of greenery (fiddle-leaf fig, snake plant) per main room pull in color and life, a subtle nod to Central Florida’s lush environment.
Styling tips for key rooms
Kitchen: trio of wood cutting boards, matte-black pepper mill, and a bowl of bright citrus.
Bathrooms: rolled white towels, eucalyptus sprig, and a teak bath tray.
Primary bedroom: queen bed (king if space allows), crisp white duvet, symmetrical nightstands with matching lamps.
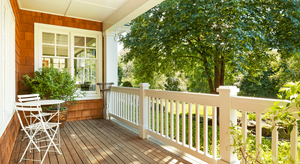
Patio: weather-resistant bistro set and a tray with faux lemonade glasses to telegraph year-round outdoor living.
Safety and accessibility for showings
Remove loose cords, tape down rug corners, and keep doorways at least 32" clear for ADA compliance. Glass décor should sit above toddler reach if families are the target demographic. Finally, verify that every staged lamp is on a timer so the home stays illuminated for evening walkthroughs without running up the electric bill.
A concise, repeating design language across all these elements ensures buyers move from room to room feeling an unbroken story—one that ends with an offer.
Step 5: Source, Install, and Maintain Staging Materials
Securing the right pieces—and keeping them photo-ready—can feel like juggling chainsaws. A streamlined sourcing and maintenance plan prevents budget leaks and last-minute scrambles.
Finding affordable furniture and décor
Local rental vendors often give price breaks for three-month blocks; negotiate if your listing window is shorter.
Big-box clearance aisles (Target, At Home, IKEA) fill accessory gaps for under $25 each.
Facebook Marketplace and estate sales are gold mines for accent chairs and mirrors—just stick to neutral upholstery so everything reads as one collection.
Keep quality levels consistent; a single bargain-bin coffee table can cheapen an otherwise high-end package.
Logistics checklist
Consultation & scope approval
Declutter, paint, and repair completed
Delivery date booked with 3-hour arrival window
Certificate of insurance received from vendors
Utilities on; HVAC set to 72 °F for worker comfort
Professional cleaning 24 hours before install
Real-estate photography scheduled the morning after staging
Ask rental companies about damage waiver costs and who covers items if a pipe bursts in a vacant home.
Installation-day game plan
Lead stager directs traffic; movers place rugs and anchor furniture first.
Handyman handles art hanging and furniture assembly while accessories stay boxed—dust settles, then final styling happens last.
Walk each room with fresh eyes before the crew leaves; snap phone photos for quick MLS teasers.
Pro tip: Keep felt pads, command hooks, and a cordless drill in a “show kit” so minor tweaks don’t require a return visit.
Maintaining the look while on market
Vacant homes gather dust faster than occupied ones. Schedule weekly 10-minute check-ups:
Feather-dust surfaces, fluff pillows, and tighten lamp bulbs.
Run faucets and HVAC briefly to prevent odors and humidity damage.
Swap bedding and throws seasonally—light cotton in Florida summers, textured knits come fall.
Pest and pet patrol: set discreet traps and confirm doors stay locked after showings.
Consistent upkeep ensures your vacant home staging continues to feel fresh, inviting, and worth the premium price buyers are prepared to pay.
Step 6: Market the Staged Home for Maximum Exposure
Great vacant home staging deserves an equally polished rollout. The goal is simple: translate the in-person “wow” into online clicks, booked showings, and strong offers. That means pro-level visuals, copy that sells a lifestyle, and open-house details dialed in to the degree.
Capture magazine-quality listing photos and 3-D tours
Natural light is your secret weapon. Shoot between 10 a.m. and 2 p.m. when Florida sun is bright but indirect, and keep blinds angled upward to diffuse glare. Mount the camera at roughly 5 ft height on a tripod; this mimics eye level and keeps lines straight.
Key photo checklist:
Turn on every light, swap to 3000 K bulbs for consistent warmth
Remove countertop clutter, trash cans, pet bowls
Frame each shot so two walls, not three, are visible—rooms feel larger
Capture one vertical “money shot” per main room for social media stories
Follow up with a 3-D Matterport or similar tour; modern buyers expect it
Write listing copy that sells the staged dream
Skip generic clichés and focus on the story your staging created. Lead with an emotional hook—“Step into an airy great room designed for seamless gatherings.” Then layer benefits:
Highlight multifunctional zones (e.g., “Zoom-ready alcove”)
Name-drop premium finishes that photographs feature
End with a scarcity cue: “One of only three staged move-in-ready homes in the neighborhood.”
Aim for 150–200 words; save deep specs for the MLS detail sheet.
Host showings and open houses like a pro
Curb appeal starts at the nose. Deploy a mild citrus diffuser near the entry and set the thermostat to 72 °F. Soft background jazz at 40 dB encourages lingering without distraction.
Open-house flow:
Hand buyers a layout flyer matching staged zones.
Post subtle arrow signage guiding guests through every highlight.
Finish on the patio with chilled bottled water to underscore year-round outdoor living.
Collect feedback cards at the exit—real-time intel to tweak staging, price, or marketing if offers lag.
Step 7: Track Results and Optimize
Good staging is not “set it and forget it.” Once the photos hit the MLS, you’ll want to watch how the market responds and tweak quickly if momentum stalls. A few numbers—tracked weekly—tell you whether the décor is converting curiosity into offers or silently bleeding carrying costs.
Metrics to monitor
Days on Market (DOM) vs. neighborhood average—if you’re 10 days over, investigate.
Showings per week—healthy pace is 5–8 for homes under $600 k in Central Florida.
Online view-to-inquiry ratio—shoot for at least 1 lead per 25 virtual views.
Agent feedback—email or text buyer agents a two-question survey (“Price perception?” “Favorite room?”) and log answers in a shared spreadsheet. Patterns guide your next move.
When to refresh or remove staging
Décor has a shelf life. Warning signs include droopy plants, flattened pillows, or repeated comments like “feels dated.” Quick, low-cost pick-me-ups:
Swap accent pillows or art for a bolder palette.
Replace faux florals with seasonal greenery.
Rotate a statement chair from another room to re-spark photos.
If offers still lag after 60 days, consider a partial de-stage to highlight square footage or, conversely, a fuller package upgrade.
Simple ROI worksheet template
Line Item Cost ($) Sale-Price Lift ($) Net Gain ($) Furniture rental (3 mo) 3,000 15,000 12,000 Paint & repairs 800 — — Photography 350 — — Totals 4,150 15,000 10,850
Break-even formula:
Break-even lift = Total Cost ÷ (1 - Listing Commission %)
Plugging in 6 % commission: 4,150 ÷ 0.94 ≈ 4,414. Any price bump above $4,414 means the staging paid for itself—and then some. Replicate this sheet with your own numbers to decide whether refreshes or price adjustments make the most financial sense.
Step 8: Common Mistakes to Avoid When Staging a Vacant Home
Even a well-funded vacant home staging plan can backfire when the basics are overlooked. The missteps below are the ones we see most often during Central Florida listing audits—and they’re all fixable for pennies compared with a price reduction.
Theme or over-personalized staging
A kayak-in-the-living-room or all-farmhouse-everything locks buyers into someone else’s taste. Stick to broadly appealing styles—transitional, light contemporary—and let accents, not anchor pieces, deliver a hint of personality.
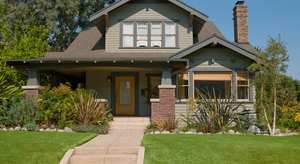
Neglecting curb appeal and entryway
First impressions form in eight seconds. Dead grass, chipped numbers, or a bare foyer prime visitors to hunt for more flaws inside. Minimum checklist: fresh mulch, pressure-washed walkway, new doormat, potted greenery flanking the door, and a console table with a simple mirror just inside.
Oversized, undersized, or mismatched furniture
Rooms feel smaller when couches hug every wall or micro-chairs float in a sea of tile. Measure before renting: allow 36 in. travel paths and choose pieces with similar leg styles or finishes so the set reads as deliberate, not cobbled together.
Poor lighting and window treatments
Dark rooms kill listing photos and in-person energy. Replace burned bulbs with 3000 K LEDs, add lamps where overheads are sparse, and hang sheer panels two inches below the ceiling line to pull eyes upward. Clean windows let Florida sunshine do the rest.
Avoid these four traps and ninety percent of staging headaches disappear—leaving buyers focused on value, not flaws.
Staging Smarts That Sell
Smart vacant home staging converts silent rooms into a story buyers can’t wait to join. The payoff is tangible: sharper first impressions, heavier foot traffic, and sales that close faster and higher than their empty, echo-ridden rivals—often enough to cover the entire staging bill and still fatten your net check.
Use the step-by-step playbook above to set clear goals, budget intelligently, and execute a cohesive design plan that photographs—and shows—like a model home. If the to-do list feels daunting, let professionals shoulder the heavy lifting.
Central Florida homeowners can start risk-free: request a complimentary staging and pricing consultation with the boutique experts at Robert Michael & Co. and see how quickly your “For Sale” sign can flip to “Sold.”